Archive for the ‘Projects’ Category
by Pertneer on Sunday, May 11th, 2014
I made quite a bit of progress this weekend. I picked up my new slave cylinder this morning from Napa (Part number: NCF 73173).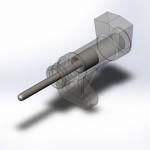 First I spent the time to draw up this slave cylinder to make sure I could make an accurate mount without any issues. It is not a perfect solid model by any means, but the critical dimension are accurate enough that my bracket came out fine.
(more…)
Tags: CJ7, Clutch, Hydraulic, Solidworks, YJ
Posted in Jeep, Projects, Repairs | Comments Off on Clutch update
by Pertneer on Saturday, May 10th, 2014
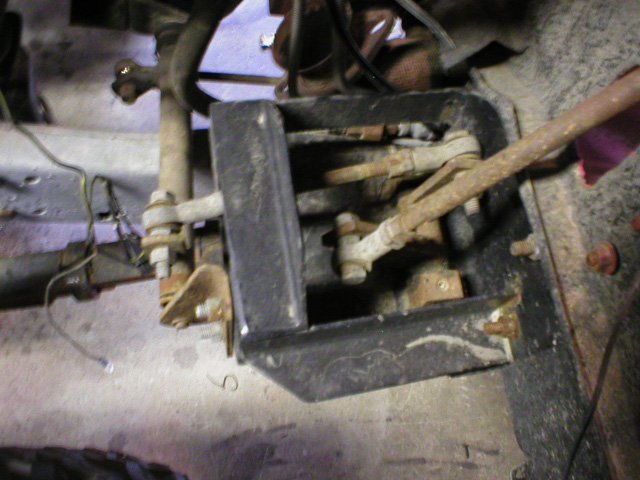
During my recent trip off-road I encountered an issue that I did not have since my last fix. The clutch linkage started to come apart during extreme twisting of the frame. At least four times during the day, at the most inopportune times I might add, it fell apart where the linkage attaches to the side of the motor.  You can see in the image that the setup is mostly custom. I utilized the original CJ7 linkage but had to move it forward enough to go around the exhaust to gain a straight shot to the clutch release arm. The stock plastic bushing and c-clip seam to be the issue and the weak point as it always was when stock. I debated on making a shaft to eliminate this type of connection but without access to the necessary machines anymore I had to go another route. So currently I am gathering parts to replace it with a hydraulic setup. I am planning to utilize the stock YJ master cylinder that I acquired when I purchased to get my body tub years ago and mate it to a CJ slave cylinder. I will determine how to get them connected when I have the slave cylinder in hand. From what I have read it is an easy thing to do, we shall see.
Tags: CJ7, Clutch, YJ
Posted in Jeep, Projects, Repairs | Comments Off on Clutch Linkage
by Pertneer on Saturday, May 10th, 2014
After a couple of weeks and a trip off-road I have not seen the outcome that I expected. The wheel that I completely took off of the rim and cleaned and sealed is leaking worse than before. The tire I only unseated the bead and sealed, but did not remove the lock side is still aired up to a reasonable pressure. I am wondering if I did not make sure I tightened the lock in a star pattern and somehow left a leak. It does last about a week which is better than before, but still not what I am looking for. I guess I either need to quit taking it off-road and get new rims or just deal with it. Ya you guessed it I will just keep airing them up all of the time.
Posted in Jeep, Projects | Comments Off on Beadlock Update
by Pertneer on Friday, April 18th, 2014
Initially when I made my beadlocks I did not have any issue with them holding air for long periods of time. Then I used for what i intended, running low air pressure and wheeling in the middle of nowhere. Since them I have been plagued with one or more tire loosing air at varying rates. Today I have done a test to see what help the most.
Since my beadlocks have 32 bolts around the edge of the wheel I found that it takes a lot of time to remove them all. So I spent a little time finding a new tool to help with this. I didn’t want to use an impact because it is a little heavy and the hose hangs up on everything in the driveway. So I found an adapter to hold a 3/8 socket in my drill. Since I didn’t have any and have been looking for a new tool to try I make the excuse to justify the purchase. Not hard to do when the wife is out of town. (more…)
Posted in Jeep, News, Projects | Comments Off on Beadlocks | Loosing Air
by Pertneer on Saturday, April 12th, 2014
Decided to do some deep diagnostics on the fuel issue today since spring has sprung.
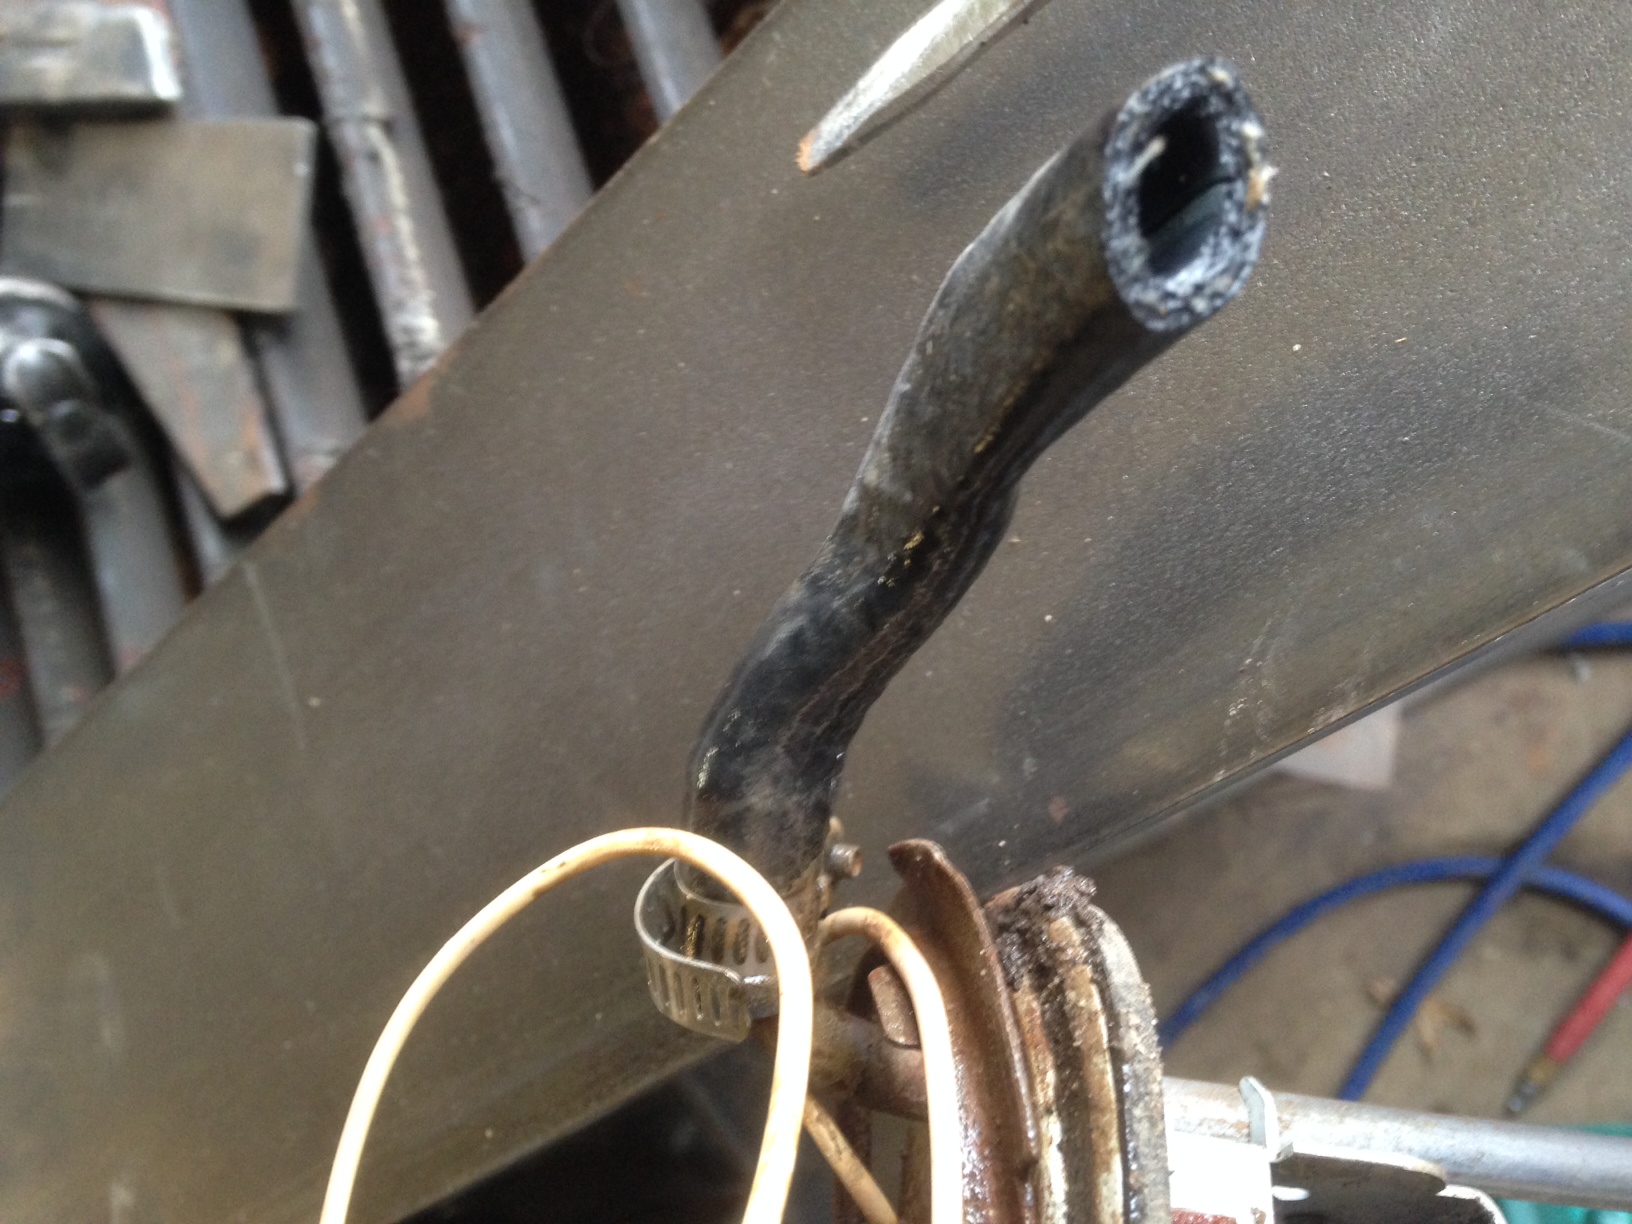
Since the fuel pump was able to bring the pressure up to the correct amount I had a wild guess to just drop the tank and see if there was an issue with the pickup. As I lowered the tank from the frame I noticed with enough certainty that I had discovered the issue. First off the tank was full, yep totally full. Not easy to take the tank out with all of that gas in it, but the it was needed to be able to get to the issue.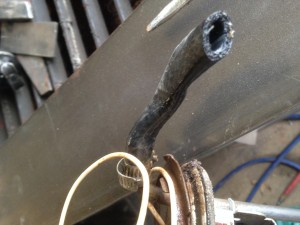 It seams that ever since I first put the tank in after totally rebuilding it I overlooked the fact that you must not let the fuel line get pinched between the tank and the body tub. I believe that the tube, when it was new, was strong enough to remain open and not cause an issue when it was new, now add 5 – 10 years and this hose could no longer remain open long enough to provide the amount of fuel needed to run the 5.0 for anymore then a few seconds at a time.
(more…)
Posted in Jeep, Projects | 1 Comment »
by Pertneer on Thursday, January 9th, 2014
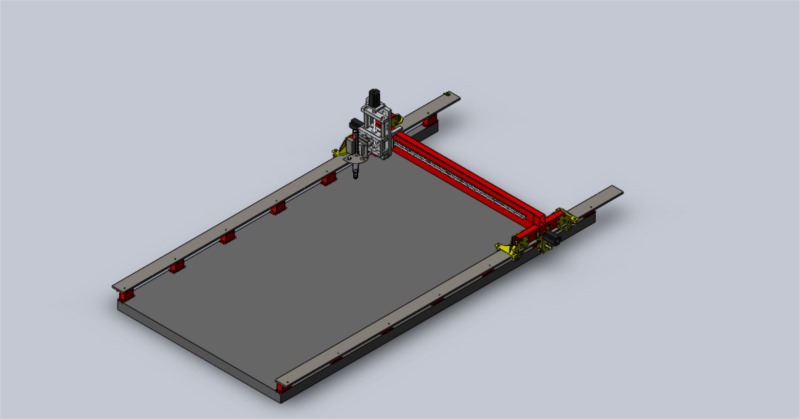
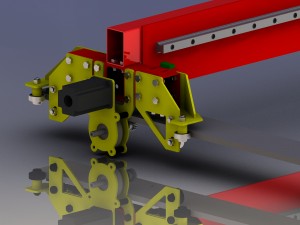
This version of the gantry has undergone some changes since its inception. Mostly because I didn’t foresee everything needed to make these changes before i started and had to make some more changes. Others were changed for future plans, while still retaining functionality until the other changes are made. This image is the future version it will finish in. The main difference from what I am doing now is the addition of the second linear rail on the y axis (gantry carrying axis). The other is a lower profile of the gantry itself to allow a better connection between the welded pieces and a overall aesthetics of the gantry itself.
(more…)
Tags: Fabrication, Jeep, Plasma, Solidworks
Posted in CNC, Plasma, Projects, Upgrades | Comments Off on CNC Plasma | Gantry Upgrade
by Pertneer on Thursday, October 10th, 2013
A collection of images of the new version of the gantry. As new photos are taken I will add them to this gallery. (more…)
Posted in CNC, News, Plasma, Projects | Comments Off on New Gantry Gallery
by Pertneer on Thursday, October 3rd, 2013
I got bored today and rendered a high quality image of the gantry. Caution when clicking on this photo it is very large!
Posted in CNC, News, Plasma, Projects | Comments Off on Gantry Photo
by Pertneer on Monday, September 16th, 2013
After using the table for quite some time, I have discovered a few issues. First off with my design for the guide rails using the v-groove wheels is flawed. The current design only uses these bearings on the top of the rail. With this type of setup it tends to not want to stay on the rails. Also when you cut thin material it tends to lift one side of the other when you change directions rapidly.
So I have been working on a new design. seen below.
The z axis will remain unchanged as will the table itself. The main changes are with the gantry itself. (more…)
Tags: CNC, Plasma
Posted in CNC, Plasma, Projects, Upgrades | Comments Off on CNC Plasma Upgrades
by Pertneer on Saturday, March 30th, 2013
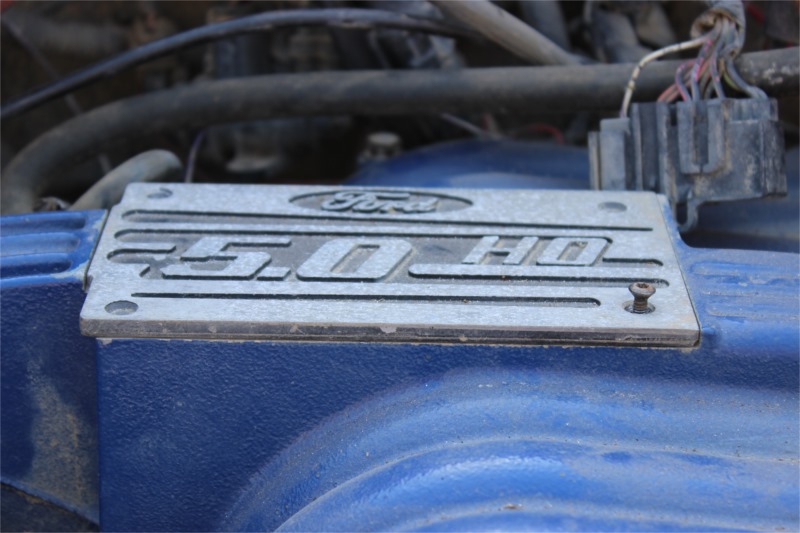
The old Jeep has been having some major fuel delivery issues among other things. In the last couple of days I have worked on some of these issues.
I started with the fuel pressure regulator, because it was not holding adequate pressure. To get the the regulator you need to start with moving the upper intake to the side a little bit for easy access. Starting from the top you need to remove the cover to get access to the bolts that hold it on.
Then you remove the six bolts that hold the upper intake onto the lower intake. (more…)
Tags: 5.0, H.O. Fuel injection, Jeep, Maintenance
Posted in Jeep, Projects | Comments Off on Jeep fuel problems