Archive for March, 2011

CNC Plasma Testing

by on Wednesday, March 30th, 2011

I have been running the machine through its paces the last few days. Today I testing the positioning accuracy of it today. I wrote a program to have the machine rapid out 84 inches then rapid back to with in 1 inch of zero then feed into zero. I did this 20 times and the machine stopped at zero plus or minus .0003 every time.

Enjoy the video.

Racing Mower Exhaust

by on Monday, March 28th, 2011

I had a co-worker wanted me to make him a custom exhaust for his racing mower. He brought me the pipe and a flange. I bent the tube to avoid the steering and the foot rest with it exiting the side of the mower Nascar style. Here is what I come up with:

(more…)

Plasma Build | Machine Testing

by on Friday, March 25th, 2011

Since I recently got this machine actually moving I have been putting it through some tests. The other day I create a G-code program to move the table throughout its travel in various directions to make sure it worked as expected and returned to its previous position.

Since the table is driven by stepper motors instead of servos loosing steps is always a concern. This is generally contributed with pushing the machine to fast resulting is the stepper motors loosing there count. Not sure why, but is does happen.

After tuning the motors in Mach 3 to suitable settings I proceeded with the testing. I started with the table at around a travel speed of 600 in/min but was not happy with the sound the table was making. It sounded like it was struggling to make the moves this fast. So I slowed it down to 450 in/min. Still a respectable speed for a rapid move. This sounded a lot better and leaves some room for improvement.

This video shows the path I programmed in and the speed in which it travels.

(more…)

Plasma Build | Testing Movement

by on Wednesday, March 23rd, 2011

As the title states I am testing the movement before I start using he torch(saves money until I make sure it is working properly.

It is kind of boring to watch, but in a later test it made a perfect circle very close to the diameter I programmed it to do. Not to bed for the first trial after setting it up.

Plasma Build | Other Pictures

by on Monday, March 21st, 2011

I just took some additional pictures of some of the aspects that are not really clear in other pictures.

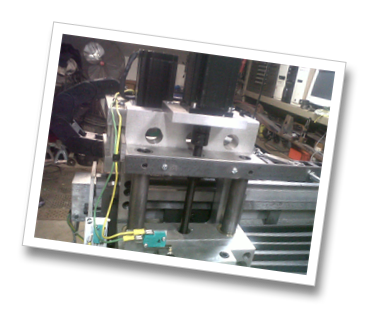
this first one shows the z-axis lead screw and placement of the stepper motor.

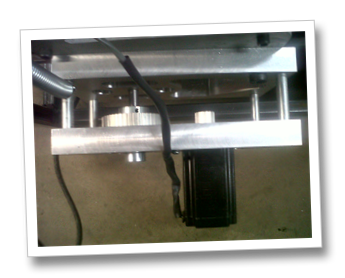
This one show the gear box from a overhead shot.

(more…)

Plasma Build | Testing the z-axis

by on Sunday, March 20th, 2011

Since I only have the hardware for the z-axis at the moment I can only test this out for now. Here is a video of this testing until I get the timing belts for the other axis’.

the Test Video

the speed of the movement is slowed down for control and should rapid at a maximum of 135 in/min

The other axis will rapid a bit faster. I should have some more video later this week of the other axis’ moving.

CNC Plasma | wiring and rack

by on Monday, March 14th, 2011

I received a large shipment of part this week of parts for my project. I still have others on the way but I got quite a bit started this weekend. I started of day with opening up all of the boxes to make sure everything was intact. I then moved on to getting the rack onto the table. This took some creativity to make sure it was on straight so that the pinion stays engaged. There is also an issue with the rack not coming in long enough pieces for the length of my table. With the table being 9 1/2 feet long and the rack only coming in 6 foot pieces I needed to join the ends while maintaining the lead along the length. I came up with the idea to use the piece cut off of the end of another piece of rack to align the pieces together. Since they are the same lead it should work.

IMG00334-20110312-1546

(more…)

Site changes

by on Thursday, March 3rd, 2011

Seems I was only allowing registered users to post comments on this site and no one could register:( . Thanks for bringing this to my attention. I hope I have made the correct changes.

Pertneer

CNC Plasma Update

by on Wednesday, March 2nd, 2011

It has been awhile since I last updated this, but this last week has been very busy with the build.

I received the last order of steel before and spent quite a bit of time preparing  for the construction of the table top. It has also gone through some other design changes. mostly to keep the cost down but others for functionality and some others just because the steel company sent the wrong steel or did not have what I wanted.

The first of these changes are with the width of the grates that the steel with sit on while being cut. I would have preferred to use just 1/8 inch wide material, but the steel supplier did not have that thickness. Why I do not know but they are a supplier for major industry and not just hobbyists. So I made the necessary changes to accommodate.

As seen in previous posts I have finished the gantry. I had a place Water-jet out the side pieces for it, instead of making them myself. Sometimes just getting it done quicker is better than cheaper. They were not as good of quality as that last place I used in the past, but that was due to me not specifying the tolerances correctly. Mental note: Sometimes it is better to do it yourself.

I started out with cutting the pieces for the table frame and taking the two cross pieces to work to make sure they were exactly the same length. This proved to be to my advantage later. I then clamped all of the pieces together making sure to measure all dimensions at least four times. Making sure the dimensions were correct to my prints as well as assuring that the frame remained as square as possible. Since this was the basis for the entire rest of the machine it had to be as close to perfect as I could get it. I then tacked all four corners together and rechecked all of the dimensions again. I then welding the inside for each corner and rechecked all the dimensions again. Yes it is easier to check them again and again before it gets completely welded and then try to fix the dimensions after it is completely welded. Especially if you do not have access to a very large press and with the table being 4 1/2 feet by 9 1/2 feet in size it would have to be a big press.

Then came the water pan. I used a piece of 14 ga. material that started out as 5 x 10 foot. I cut it to size and started tacking it in place to the under side of the table. I then finished welding it in small sections on a side to keep the level of heat down to a minimum. Me in my rush to see some progress may have got a little carried away with the speed at which I did this and ended up putting in about a 1 inch crown in the table. I had a plan and was hoping that by the time I added the angle to the top of the table the crown would pull itself out. This happened for the most part. The rest I got out when I clamped it to the legs. and welded on the mounting pads for the table to attach to them. Overall you can not even see that there is a little bit of a crown in the middle of the table. I do mean little. It is less than a 1/64 of an inch. Not to bad.

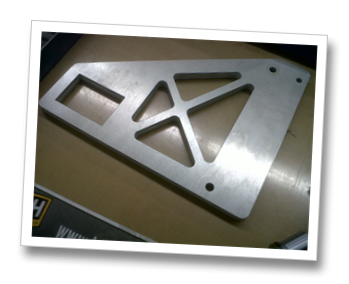
This first picture is of the gantry ends. They are made from 1/4 inch aluminum. Too bad I sent them to get made before I remembered I needed to attach them to the 2 x 3 inch square tube. Since I do not have the ability to weld aluminum I had to come up with another way. These attachments had to keep them square to the crossbeam and parallel to each other.

(more…)