Archive for the ‘Plasma’ Category

Plasma Build | Testing the z-axis

by on Sunday, March 20th, 2011

Since I only have the hardware for the z-axis at the moment I can only test this out for now. Here is a video of this testing until I get the timing belts for the other axis’.

the Test Video

the speed of the movement is slowed down for control and should rapid at a maximum of 135 in/min

The other axis will rapid a bit faster. I should have some more video later this week of the other axis’ moving.

CNC Plasma | wiring and rack

by on Monday, March 14th, 2011

I received a large shipment of part this week of parts for my project. I still have others on the way but I got quite a bit started this weekend. I started of day with opening up all of the boxes to make sure everything was intact. I then moved on to getting the rack onto the table. This took some creativity to make sure it was on straight so that the pinion stays engaged. There is also an issue with the rack not coming in long enough pieces for the length of my table. With the table being 9 1/2 feet long and the rack only coming in 6 foot pieces I needed to join the ends while maintaining the lead along the length. I came up with the idea to use the piece cut off of the end of another piece of rack to align the pieces together. Since they are the same lead it should work.

IMG00334-20110312-1546

(more…)

CNC Plasma Update

by on Wednesday, March 2nd, 2011

It has been awhile since I last updated this, but this last week has been very busy with the build.

I received the last order of steel before and spent quite a bit of time preparing  for the construction of the table top. It has also gone through some other design changes. mostly to keep the cost down but others for functionality and some others just because the steel company sent the wrong steel or did not have what I wanted.

The first of these changes are with the width of the grates that the steel with sit on while being cut. I would have preferred to use just 1/8 inch wide material, but the steel supplier did not have that thickness. Why I do not know but they are a supplier for major industry and not just hobbyists. So I made the necessary changes to accommodate.

As seen in previous posts I have finished the gantry. I had a place Water-jet out the side pieces for it, instead of making them myself. Sometimes just getting it done quicker is better than cheaper. They were not as good of quality as that last place I used in the past, but that was due to me not specifying the tolerances correctly. Mental note: Sometimes it is better to do it yourself.

I started out with cutting the pieces for the table frame and taking the two cross pieces to work to make sure they were exactly the same length. This proved to be to my advantage later. I then clamped all of the pieces together making sure to measure all dimensions at least four times. Making sure the dimensions were correct to my prints as well as assuring that the frame remained as square as possible. Since this was the basis for the entire rest of the machine it had to be as close to perfect as I could get it. I then tacked all four corners together and rechecked all of the dimensions again. I then welding the inside for each corner and rechecked all the dimensions again. Yes it is easier to check them again and again before it gets completely welded and then try to fix the dimensions after it is completely welded. Especially if you do not have access to a very large press and with the table being 4 1/2 feet by 9 1/2 feet in size it would have to be a big press.

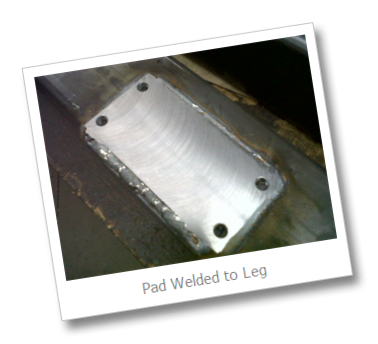
Then came the water pan. I used a piece of 14 ga. material that started out as 5 x 10 foot. I cut it to size and started tacking it in place to the under side of the table. I then finished welding it in small sections on a side to keep the level of heat down to a minimum. Me in my rush to see some progress may have got a little carried away with the speed at which I did this and ended up putting in about a 1 inch crown in the table. I had a plan and was hoping that by the time I added the angle to the top of the table the crown would pull itself out. This happened for the most part. The rest I got out when I clamped it to the legs. and welded on the mounting pads for the table to attach to them. Overall you can not even see that there is a little bit of a crown in the middle of the table. I do mean little. It is less than a 1/64 of an inch. Not to bad.

This first picture is of the gantry ends. They are made from 1/4 inch aluminum. Too bad I sent them to get made before I remembered I needed to attach them to the 2 x 3 inch square tube. Since I do not have the ability to weld aluminum I had to come up with another way. These attachments had to keep them square to the crossbeam and parallel to each other.

(more…)
CNC Plasma | Gantry Almost complete

by on Saturday, January 29th, 2011

I have completed quite a bit this last couple of weeks. I made the leveling feet for the lags and came to the conclusion that it was going to be to high once they were on, so I had to cut the legs 4” shorter. This brings the overall height don to a more reasonable level, about 39 inches to the top of the table.

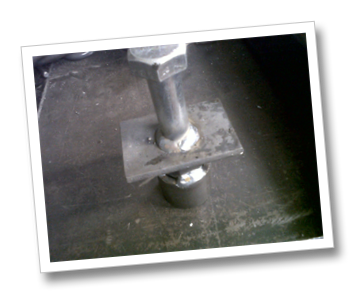
The feet are pretty simple to build and can be done with a chop saw and a drill press.

I used a piece of Dom tube that I had laying around. Cut some 1 5/8” long pieces and welded on a 3/4 – 10 heavy hex nut. I then welded a 3/4 –10 bolt threw a hole in a 1/4” thick piece of steel cut to match tube dimensions. To make sure the plate was welded with bolt sticking out straight I ran the nut onto the bolt with the plate in place. Then I held the bolt on end pushing down on the plate so that it was at the base of the threads. I was pleased with the way this worked.

(more…)

CNC Plasma | 4th Axis

by on Saturday, January 8th, 2011

This gives me some new ideas:

coping Tube With a CNC Plasma cutter

Plasma Build | More parts

by on Sunday, December 19th, 2010

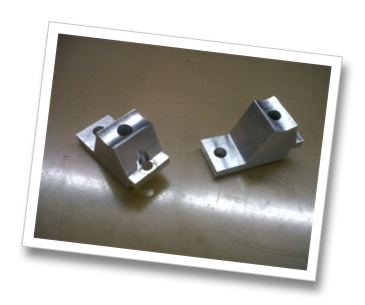
I got some work done this week on this project. I finished up the support pieces that hold the guide rails for the gantry.

These were a trick to design and produce with the angles and the partial radius, but not real bad. Just took some planning on what needed to be machined first.

(more…)

Plasma Build | Update

by on Tuesday, December 14th, 2010

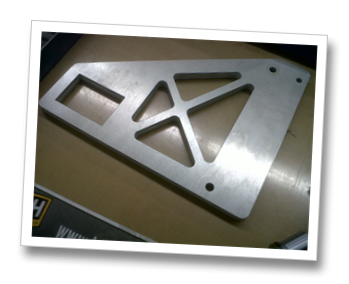
After asking some important question with the supplier of the control system I found that I need to put my gantry on a little diet. At 130 lbs. it was a little over weight to say the least. So I went back to the drawing board to see where I could save weight without compromising structural integrity. This is a small portion of what I came up with.

This is the bracket that the torch mount attaches to.

(more…)

Plasma Build | Progress report

by on Sunday, November 21st, 2010


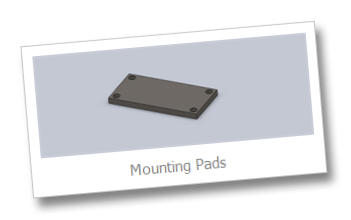
The last two weeks have been kind of slow as far as progress. I started off with ordering some of the steel to make the leg section of the table. This included the 2 x 3 inch rectangular tube  and the 1/4 x 2 flat stock used for the mounting pads. I am making the leg section in a way that I can disassemble and move it with ease. So the legs are all bolted together using a piece of 1/4 by two 5 inches long with either four drilled holes or four tapped holes.


(more…)

Plasma Table | Gear box

by on Thursday, November 4th, 2010

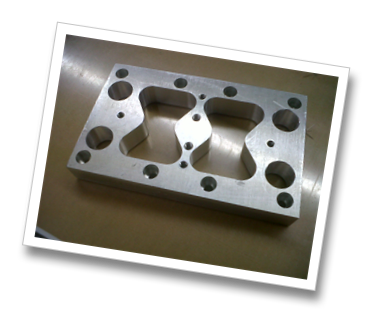
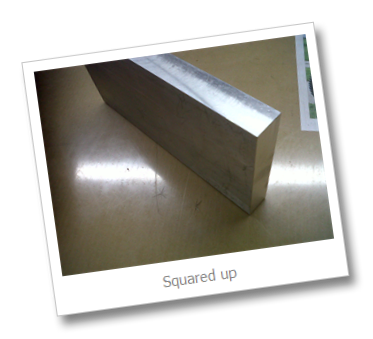
I started off this week with getting under way with the constriction of the gear boxes for my CNC plasma table. I started with just the simple task of squaring up the side pieces to bring them into size. Once completed I would be able to utilize the CNC mill to put in all of the holes.

(more…)

Plasma Table | Gear Box

by on Saturday, October 30th, 2010

I found a great deal on some material the other day to make most of the gearbox and z axis components out of for this project. I changed my design last week to reflect the size of material I found. I picked it up yesterday and started machining the parts. For the gear box I am making the front and rear pieces from 1” think aluminum. It may be a little over kill but it was a really great price. I paid scrap price for these pieces. Spent about one hundred bucks and have more than enough to complete this project with some to spare. I forgot my camera last night to take some pictures of making them but I will get them this next week.


So far I only have the gear box pieces machined on to sides and will be working on the length and the holes this next week with pictures I promise.